Preparation
1. Preparation & tools
Required time: 5 min.
Installing the GROHE Blue Home
Level of difficulty

Required time
ca. 30 minutes

Required persons
Which tools do I need?
Screwdriver
Centre punch (alternative: pointed screwdriver / cross recess)
Drill with 63 mm drill bit

19 mm spanner
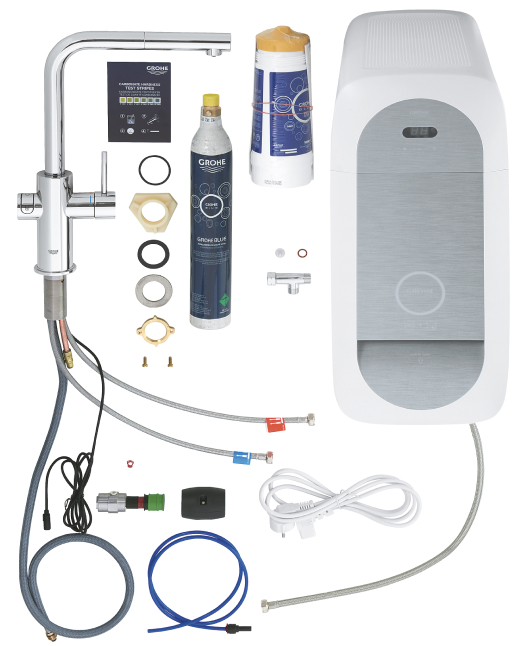
The package contains
- GROHE Blue Home cooler
- GROHE Blue Home tap
- Fixation set
- GROHE Blue size S filter
- GROHE Blue CO2 bottle of 425g
- Connection material (hoses etc.)
- O-Ring and fastening set for tap
- User manual
- Ventilation cut-out template
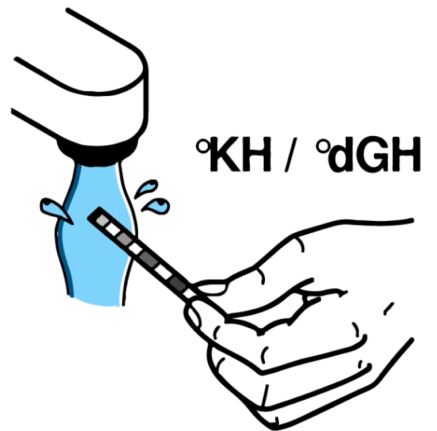
- Carbon hardness test stripe with TPI
Requirements on the installation site
- Max.1 m (4,5 m with optional extension set 40843000) distance between cooler and tap
- Min. width of the cabinet: 30 cm
- Min. depth of the cabinet: 51 cm
- Position of the waste trap and angle valves has to be checked to avoid a collision with the cooler
- Min. 2 bar water pressure needed

Testing the carbon hardness
To be able to make the right settings on the filter, you should test the carbon hardness (KH) of the tap water before starting the installation of GROHE Blue Home. To do this, simply hold the enclosed test stripe in the tap water which then changes colour. You can now compare the colour of the stripe with the enclosed colour scale and thus determine the water hardness.
